Is your 2003 Acura RSX headlights’ OEM H1 LED bulbs starting to feel their age when the sun goes down? The stock halogen headlights, while adequate in their day, can’t hold a candle to the crisp, white, and incredibly bright light of modern LEDs.
Upgrading to LED bulbs is one of the most rewarding and cost-effective mods you can do. It dramatically improves nighttime visibility, modernizes the look of your car, and is surprisingly DIY-friendly.
This guide will walk you through the entire process of installing an LED bulb in your 2003 Acura RSX headlight. Let’s get your vision up to speed!
Table of Contents
2003 Acura RSX Headlight Bulb Size Guide
| Bulb Type | Bulb Size |
|---|---|
| 2003 Acura RSX Low Beam | H1 |
| 2003 Acura RSX High Beam | H1 |
| 2003 Acura RSX Fog Light | H11 |
| 2003 Acura RSX Back Up Light | 7440 |
| 2003 Acura RSX Brake Light | 7440 |
| 2003 Acura RSX Dome Light | C5W-31MM |
| 2003 Acura RSX Front Turn Signal | 7440 |
| 2003 Acura RSX License Plate | 168 |
2003 Acura RSX Might Need a Special Adapter?

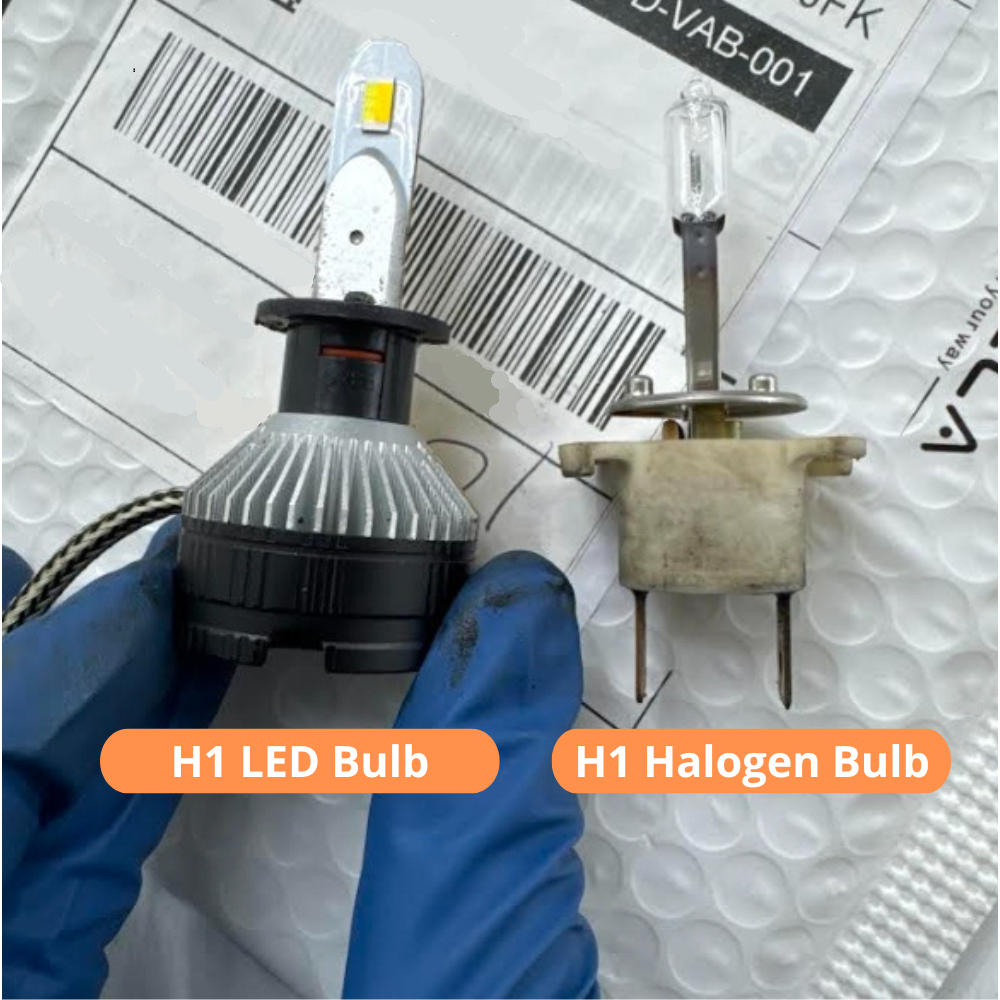
The OEM headlight on your 2003 RSX comes with an extra special holder (specifically, an H1 bulb for the low beam). Please check the attached picture. In this case, when you upgrade to an H1 LED Bulb, how should we install it?
2003 Acura RSX Low Beam LED H1 Upgrade Step
- You remove the OEM halogen bulb.
- You remove the OEM plastic retainer from the headlight housing (it usually unscrews or unclips).
- You screw or clip the new LED adapter ring into the exact same place the old retainer was.
- The new LED bulb is designed to fit through and lock into this new adapter ring.
- You then use the original wire clip to secure the entire new assembly, just like before.
This system ensures the LED bulb is held securely and, crucially, that the LED chips are positioned as close as possible to the original halogen filament’s location for correct beam pattern focus.
Best Options for H1 Headlight LED Bulbs
| Items Pic | Brightness&Power | Best For |
|---|---|---|
C4 Series LED H1 Bulb  | 100W 12000LM | Rainy, foggy, or snowy conditions; versatile color options for all weather |
NL Series LED H1 Bulb  | 180W 21600LM | Extreme brightness for off-road or rural driving; maximum visibility |
ND Series LED H1 Bulb | 140W 16800LM | Everyday driving; bright, crisp white light for urban and highway use |
NR Series LED H1 Bulb  | 110W 13200LM | Balanced performance for city and highway driving; energy-efficient |
H1 LED Headlight Bulbs FAQs
What is an H1 LED light bulb?
An H1 LED bulb is a type of automotive headlight bulb that uses LED technology and has an H1 base. The H1 bulb is typically used for single-beam headlights, meaning it is designed to function as either a high beam or low beam, but not both (unlike dual-filament bulbs like the H4 or 9007). H1 bulbs are commonly used in both cars and motorcycles for high-beam or auxiliary lighting.
Can I replace my H1 halogen bulb with an H1 LED Bulb?
Yes, you can replace a halogen H1 bulb with an H1 LED bulb as long as the LED bulb is compatible with your vehicle’s headlight assembly. However, some vehicles may require canbus adapters, load resistors, or other modifications to prevent flickering, error codes, or malfunctioning due to the different power consumption of LEDs.
Can I use an H1 LED in my motorcycle or ATV?
Absolutely! The benefits of lower power draw and brighter light are excellent for motorcycles and powersports vehicles. Just ensure the physical size of the bulb and its cooling system (fan or heatsink) will fit inside the headlight housing.
Are H1 LED bulbs truly “plug-and-play”?
Yes, from a physical and electrical connection standpoint, they are designed to be plug-and-play. They use the same H1 connector and base as your original halogen bulbs.
Can I install H1 LED myself, or should I hire a professional?
Yes, H1 LED bulbs are designed for easy installation and are typically plug-and-play. The installation process involves:
- Turn off the vehicle and disconnect the battery.
- Access the headlight assembly or housing (usually by removing the headlight cover).
- Remove the old halogen bulb.
- Insert the new H1 LED bulb and ensure it’s securely in place.
Reassemble the headlight housing and reconnect the battery.

